Showing posts with label Jewelry/Accessories. Show all posts

Friday, March 18, 2011

Fabric-Twisted Rosette Tutorial


I love accessories.  I love accessories which can be switched out with ease even more!  I bought a package of plain headbands at Kohl's a few weeks ago and decided to spruce them up with some fabric flowers.  Except I didn't want them spruced up permanently (sometimes I like to be a bit plain-jane).


Take a strip of fabric about 12" long and 2" wide (obviously you can play with these not-so-precise measurements to make the rosette more to your liking).

 Fold the strip in half the long way with the wrong sides together.

Begin rolling the fabric around itself at one end.  Once a small "rosette center" has formed, begin twisting the tail of the fabric as tightly as you can.

Wrap the twisted tail of fabric carefully around the rosette center you made previously.  Note:  The fabric should be even with the rosette center on the top.  The bottom of the rosette center you rolled will hang out the back a bit unevenly.


If the rosette gets too large for you to handle (or your fingers cramp up like mine) just guide a strait pin through the twists to the center to hold it in place while you continue.

 **See the rosette center hanging out the back?**  
To put a clean finish on the back of your rosette (and to hide the rosette center piece) just leave part of the tail untwisted and hot glue it to the rosette's back side.  There are two options here:  You can cut the fabric to size after it's been glued (like I did with the pink flower), or you can leave the tail hanging off to look like a leaf (which is how I did the tan one in the first photo).

 Then, hot glue a little loop, just large enough for your headband to slide through (that way, you can wear it on whichever headband you choose!).  It could also be slipped through a pin and worn as a broach, on a chain, or string of pearls/beads.

 ...And since my husband is a jeweler/gemologist, we have hoards of stones around the house.  I stole three to embellish the center!  This is also a great craft for a girl's birthday party/church activity as it requires minimal sewing/crafting skills.  Plus, it's also a great way to get rid of the fabric scraps you've got just hangin' around!

Thursday, February 17, 2011

DIY Embellished Flip Flops

I know it's not quite flip flop season yet, but they are now in
stores, so I guess the warm weather will be here soon!
I love the embellished flip flops that I've seen at Gap and
JCrew, but I don't like the price! They are usually about $20.
I decided to make some of my own.
I started off with $2.50 flip flops from Old Navy and
added my own embellishments.


For my little girl I made tulle flowers with a rhinestone
center, which I had on hand, so total cost $2.50

And for mine I bought some giant $3.50 earrings from
Forever 21 and glued them on! Total cost $6

The possibilities with these are endless, and I
definitely plan on making more!

Monday, December 27, 2010

Interchangeable Hair Flowers Tutorial

I can't take credit for this wonderful genius idea. A friend of mine had one of these for her little girl. We were looking at it and decided that we could totally make our own! What's cool about them, is that they are totally versatile. You can make different pieces that match different outfits and totally mix and match them as you like. They are not that hard to make at all!

Here are the supplies you will need to make your own:

faux flowers or material to make your own flowers
felt
hole punch
hot glue or a strong glue of some type
tulle, faux flower leaves, accents to go with your flowers
buttons or something similar to make up the interchangeable flower centers (I made 3 center pieces, so I used 3 buttons)
plain hair clip
a plain stretchy headband (optional)
hardware

Here is some hardware you should get. I've labeled each piece so that you can see how they go together throughout the tutorial. Make sure that your B piece can fit around the C post. My A piece fit around the D screw. You will only need the A piece if you want a bigger center piece (button) for your flowers. 
Here's a closer look at pieces C and D. The D piece screws into the C piece. I found these pieces at a hardware store. They are super cheap. I think it was like $0.40 for the both of them.
Here are some flowers I used and a button I liked.

1. Putting together the hair-clip piece 

Put piece B over piece C and secure with glue, then glue this to the hair-clip like shown below.


2. Making the center pieces

Get your buttons that you will be using for the center pieces. Cut off the back piece that extends out on each button.
You will then glue piece D to the back of the buttons. If you are using a large button, you can glue piece D to piece A before you glue it onto the button. Each of these pieces will screw into the hair-clip piece. I ended up with a gold one, a pearl one, and a black one.

3. Putting together your flowers

Pull apart some faux flowers. I ended up with separate petals with holes in the center. Make sure that you match up the hole in the middle and just hot glue around the hole and stack up and glue the petals back together one-by-one. Choose as many flowers as you want!
Or you can make your own flower, like I did here. I almost felt like I was sinning as I cut apart an old book to get my petals--but it was totally the look that I was going for. I brushed the edges with some gold paint. I also cut up some tulle to go in between the petals.
I glued them all together one by one and punched a hole in the center.

4. Making the flower accents

Grab your piece of felt. I traced around a spool of thread to make my circles. You will need two circles of felt for each accent.
Punch a hole in the center of each piece of felt.
Put your accent piece, in this case--a feather, in between the pieces of felt and glue them together.
Make as many accent pieces as you want!


Here is the assortment of pieces I put together and ended up with.

Now all you have to do is pick out the pieces that you want on the hair-clip, stack them onto the hair-clip post, and screw on the center piece.

Check out all of the different looks that you can get out of this project! You can even clip them onto headbands for something different. The possibilities are endless :)


Linked up with:

Tuesday, October 12, 2010

Button Inspired Jewelry

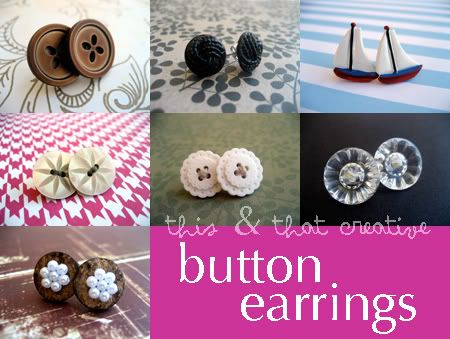
Buttons. I love them. They add a little something to so many projects. So why not let them be the project? Here are some button earrings I've made:

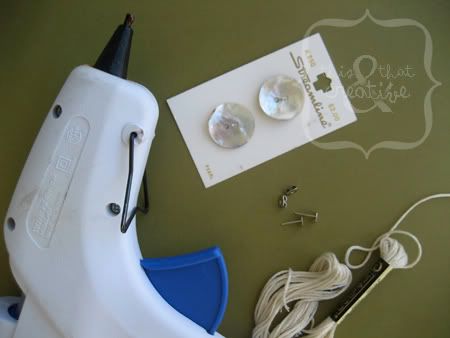
All you need are two buttons, two earring posts w/backs, thread (if you want), and some super glue or hot glue & a glue gun. It's all pretty basic and doesn't take long at all. 

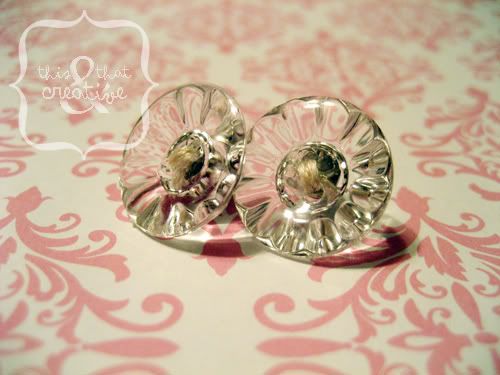
Thread the buttons so they look finished (if you want), tie a knot on the back, and cut the ends off. Then just glue them to the earring posts. If your buttons don't have holes exposed on the front, you will have to deal with the loop that extends off of the back of the button. Just use some cutting pliers, or something similar to cut the back loop off before you glue the earring posts on. There's no need to thread anything in this case.

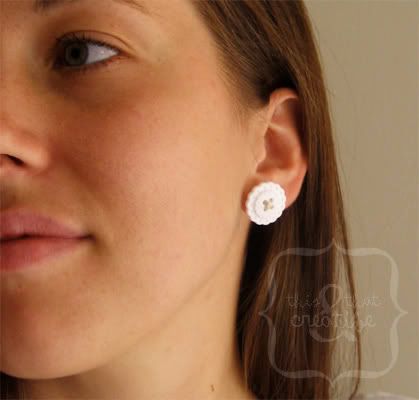
I've gotten more than one random compliment from strangers when I have worn mine. 

You don't have to stick to just making earrings either. You can make rings, bracelets, etc. 
Check out the cute bracelet my sister, Lizz Gibson, made:

And aren't we so lucky that there are buttons to match every outfit?

Linking up with:

Tuesday, October 5, 2010

Halloween Necklace and Earrings

This is a great idea for a cute, simple Halloween necklace and earrings. If you're like me you want to be festive without having to wear a dangling ghost or witch around your neck. This is a simple way to throw some black and orange into your wardrobe without screaming "Happy Halloween!"

For this necklace you will need anywhere from 20-30 each small black and orange beads, 40-60 earring wires with the flat piece at the end, necklace chain for both your earrings and the necklace (you can do whatever length you want on your necklace, I chose a length that would fall just below my collar bone), earrings, 40-60 small jump rings, 4 regular size jump rings, and a lobster clasp.


Your next step will be to put each of your beads on an earring wire, bend it just above the bead, cut it off 1/2 inch from the bend and twist it into a loop.


Before too long you will have a pile that looks like this...


Next, count out two pieces of chain 10 links each, and use a jump ring to attach each of them to an earring post.

Using the small jump rings attach the small beads to the chain, putting one bead in each link and alternating black and orange. I put eight beads, 4 black and 4 orange, on each piece of chain. Then you will use the same concept for your necklace. Cut your chain to the length you want it and start putting beads on in the center and working out to each side to assure that the necklace looks even. I placed my beads in every fourth link, but you can go closer or further apart depending on the look you are going for. The last step will be to attach your lobster clasp with the two remaining regular jump rings.

Now you have a cute Halloween look without being overdone!


Linked up with:

eighteen25

Tuesday, September 21, 2010

Long Dangle Necklace

I have seen these necklaces all over and have made quite a few for members of my family. They are easy to make, and fun to wear. This is what the necklace will look like when we're done.


The first thing you will need is chain. As always, MICHAEL'S. They have a great selection and great prices! You can buy chain in smaller amounts, or by the spool if you think you're going to be making a lot of jewelry.

What you want to do first is put the chain around your neck, decide how long you want your necklace to be, and then subtract about 4 inches. I like to use a larger chain for this type of necklace since the whole concept of the design is BIG.


Next, you are going to need earring post wires. There are two different types shown here. One has a loop on the end and the other a flat pice to hold the bead on the wire.


You can buy just the flat end piece posts and snip of the end to make your own loop. For this project you will need both. I tend to only buy the long length wires as I use my left over pieces for other projects.

Next you will want to select 3 beads to go on the side of your necklace. The large black beads that I chose will need to have an earring wire with a loop on the end run through them. Bend the wire at the edge of the bead and then cut it with the wire cutters on your pliers to about 1/4 to 1/2 of an inch past the bend.


Now use your round jewelry pliers to grab the end of the wire, then twist your pliers to roll the wire around the pliers and make a loop.


You will need to do this with the other bead as well, or with whatever beads you use. The third "bead" I chose was more like a piece of chain that doesn't need a wire, just a couple of jump rings.


The next thing you will need is four jump rings.


Use these to connect the three beads together and to either end of the chain.


You will need three more pieces of chain, each one longer than the next. The smallest need only be about 5-7 links long and the longest no more than 15.


Then select your 3 "dangling" beads. This is where you will need the earring wire with the flat end. Run it through your bead, then make the other end into a loop just as you did before.


Now attatch each dangling bead to a small piece of chain with a jump ring. You will want to put the largest bead on the longest chain, then put the others on which ever you want.


Now we need to make a spot for these to go. Take your necklace, lay it out, and open the chain up 4-5 inches down from your row of beads.


Next you will need a larger size jump ring. I have shown the size of the one I used here in comparison to my beads. You can use a larger one, I just didn't have one on hand.


Where you have opened up your chain, put it back together using the large jump ring. Mine was too thick to fit through the links, so I used two smaller jump rings to attach it. Then you will use three more jump rings to attach your dangling beads and chain to the large jump ring. It will look more balanced if you put the largest bead in the center.


And now you are finished! I don't worry about putting a clasp on these necklaces as they are long enough to easily go over your head. Try using different colors and random patterns. There's no limit to what you can do with these!


LinkWithin

Related Posts with Thumbnails