Images are sooo important. Think about it: no one would buy an item online if there wasn't a picture of the item. This same idea applies to blogs too. Especially when you have those amazing crafts and creative ideas that you want to display!
Not only do you need to have images, but the quality of your images makes a difference too. Sometimes a real-life item being presented is amazing, but the image of it is not. If a viewer was just going off of the picture, they wouldn't really see the true quality of the item because the picture does not represent the item well. Bottom line: This little tutorial is here to help you to display your creativity at its best!
All of my examples of images (labeled w/This & That Creative) are taken with my little old point and shoot camera, to illustrate that you don't have to have a super fancy expensive camera to get good pictures (although they are nice!)!
Here are a few tips:
White balance
If your white balance is off on your camera, your pictures may be too cool or too warm looking.
picture from www.digitalshotsguide.com
White balance pretty much means how white your whites are in your pictures. If your whites are off, it changes all the other colors too. Our human eyes automatically adjust the whites by themselves; cameras can try on auto mode, but sometimes they just can't quite get it. Most cameras, even point and shoots, have this white balance feature to adjust. Different lighting requires different adjustments. Most cameras even have little symbols to help you know when and what to adjust to.
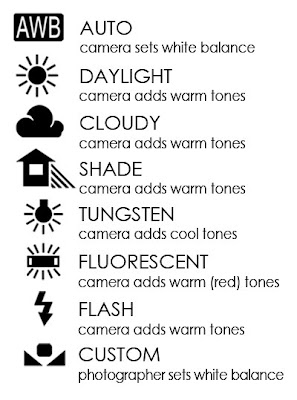
image from Elizabeth Halford Photography Blog
If you don't see the symbols on your camera to help you, take a look at your camera manual for help. You can play around with the different settings until you get the result you want. There really is no right answer. Just adjust it to how it looks good to you! If you don't trust your judgment, compare your picture to another picture that you like that someone else has taken.
The automatic flash vs. natural light
I think the flash more often than not, can really make an object look cheap. Especially if there is a lot of flash. It usually just drowns out your object.
Flashes are great for candid shots of people when it's dark etc., but it just doesn't seem to be the best for really letting your object show its true self. Sometimes you can get away with using the flash for your object, but it can be tricky.
Use natural lighting if you can. The best times of day are morning, late afternoon, and evening. If you don't want to go outside, you can always use diffused lighting from a window even in midday. Be careful that your pictures don't get blurry though, especially if you have a hard time holding still. You may need to just rest your elbows or your camera on a tripod or something sturdy to avoid blurriness. If you are having a hard time with blurriness even while holding still, you may just need to find a spot with a little more light.
Here is a set up that I did to use natural light:
I just took a couple of place mats and set them up by my sliding glass door where the light could shine in.
The background
Avoid backgrounds that are:
- Too busy. You will usually want to choose a background that makes your item stand out. It shouldn't be too busy. It really can be more distracting than complimentary to the object.
- The same color as your object. Choose a background that isn't the same color as your object. Think contrast. Help your item pop from the picture.
- Messy. You can distract from your object if you have a messy house background, etc. There are some parts of my house that just seem to be constantly messy with a toddler running around all over the place. Really be aware of everything in your viewfinder!
Tip: You can use scrapbook paper as backgrounds for small items like jewelry that you want to get close-ups of (macro mode on).
Macro mode
When you want to take a close-up shot, you can't even get close to getting any great details of your object without the macro mode on. Macro is usually represented as the little flower button on your camera. It makes all the difference.
Composition
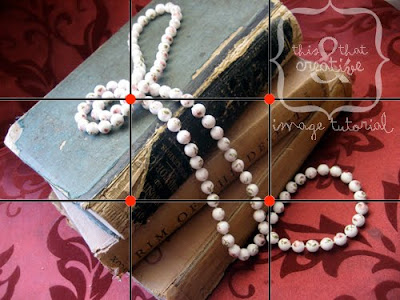
The rule of thirds is always a good rule to go by. Here is a graph shown from secondpicture.com. The rule is that you try to get your main focus/your object where one of the red dots is shown. You don't always have to do this, it's just a safe way to go. Sometimes having your object right in the middle is great too!
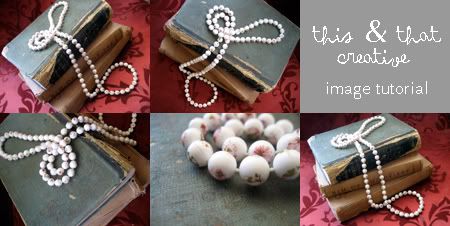
See how the loop in the necklace is in the rule of thirds?
You can also get creative with your angles for a fun composition. This set up is untouched. I just used different angles to shoot it at. Look at all the different shots I got without moving a thing!
Lots of pictures
Don't be afraid to take a lot of pictures. This is especially true if you feel unsure about your photography skills. You don't have to worry about wasting film if you're shooting with digital, and you can just delete all the ones you don't like afterward. This also helps you get familiar with your camera. You can write down the settings after each shot, and see which settings you like best for the lighting you have. Remember that with different lighting, you will have different settings that work for you.
Photographing larger objects
If you want to post an image of a piece of furniture and your house looks great, just shoot it in its natural setting, using diffused lighting from a window if possible. If you don't feel like your house is a good setting, you can ask a friend if you can take it to their house to photograph. You can also take it outside. Be very careful of weird shadows and the objects in the background. Keep in mind the ads or other posts of furniture that stand out to you that you like, and try to follow the same example.
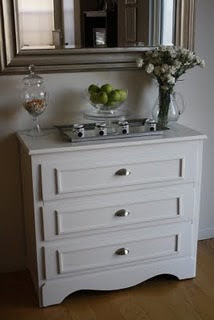
When photographing pictures and framed art, etc., you can hang it on the wall and photograph it in a room setting (showing other items like furniture etc., but still focusing on your main object) which is a good idea if you don't want to bother with making it look straight.
image from country living
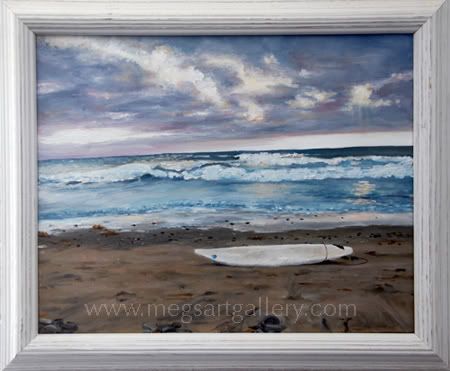
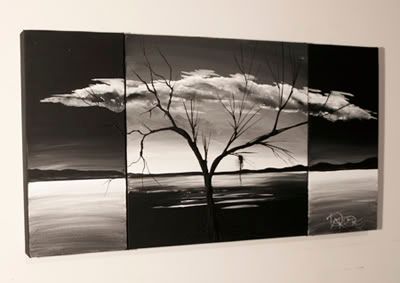
If you want just your picture or artwork to be the only thing in the picture, you can put it on the wall or floor and stand directly above or in front of it, especially if you want to get the details. Your art will not look straight unless your camera is directly in front and center of your art. That is what I had to do when photographing this piece. I had this painting on the floor, and I was standing on a chair and leaning over as far as I could to get this shot.
If you have grids on your viewfinder, use them to help your picture look proportioned. You can also crop your image afterword on your computer if you don't like how your background floor/wall looks in the picture.
Photoshop Tip: If you don't think you got it quite right, you can go to Filter in the the menu bar> Distort> Lens Correction, and in the Transform box you can adjust the vertical or horizontal perspective, if you want it to look a little more straight.
If you feel the that the task of making your art look straight is too much work, take a picture of it at an obvious angle like this, and it will still look great!
Image from HERE. Painting by Theo Dapore.
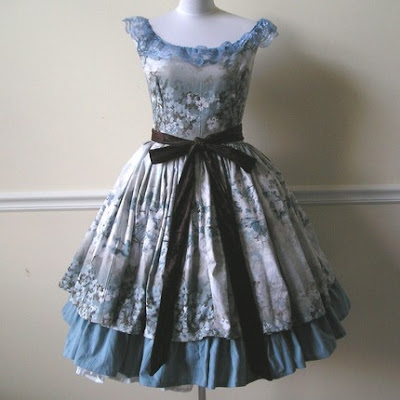
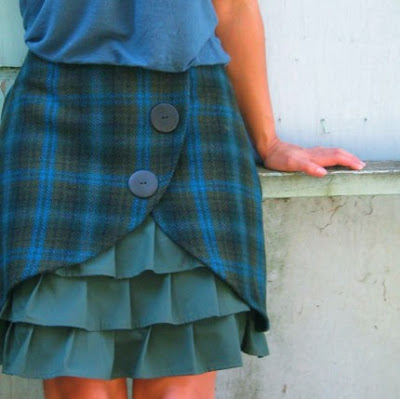
Clothes look good on a mannequin, body form, or person.
From Audrey and Grace Couture Etsy Shop found HERE
From Love to Love You Etsy Shop found HERE
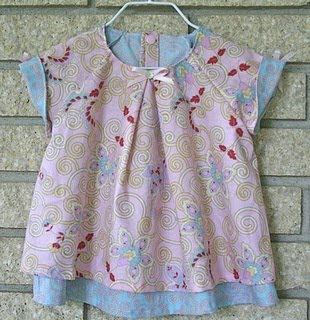
You can also show it without a model of some type, but make sure that the clothing item is is wrinkle free and laying flat or on a hanger.
Keep all other rules in mind--lighting, background, etc.
Using an image from the web
Sometimes you want to reference your inspiration, or compare your item to a more pricey item by showing their similarities. I've seen instances where someone has posted an image from the web, but the image is too big for their post. Part of the image is cut off or sneaks into the sidebar and it makes the blog look unbalanced and distracting.
This isn't anyone's real blog; I just uploaded a picture that was too big in a blog I haven't really started. You can see that the picture sticks way out into the background of the blog. Not so great looking.
Pay attention to the sizes of the images when you add them. You should be safe to add the image directly from the web if it is 400 pixels wide or less, but it all depends of the size of your post width; sometimes you can go bigger. If it IS too big, you would want to download the image onto your computer then upload it onto your blog from your computer. Blogger automatically resizes it if you add it through the Add Image button from your computer. Yes, it is an extra step, but it does make a difference.
If you like bigger pictures (click
HERE for the tutorial on how to make bigger pictures on your posts), then you will need to resize the image after you have downloaded it to your computer before you take your next steps.
Also, if the picture isn't yours, I feel that it is necessary, and polite, to reference your readers to where you got it from!
Now you are ready to display those crafts at their best!


